Sunday, January 26, 2014

The Art of Making a Bangin' Sandwich!

Cold Turkey- Hot Turkey


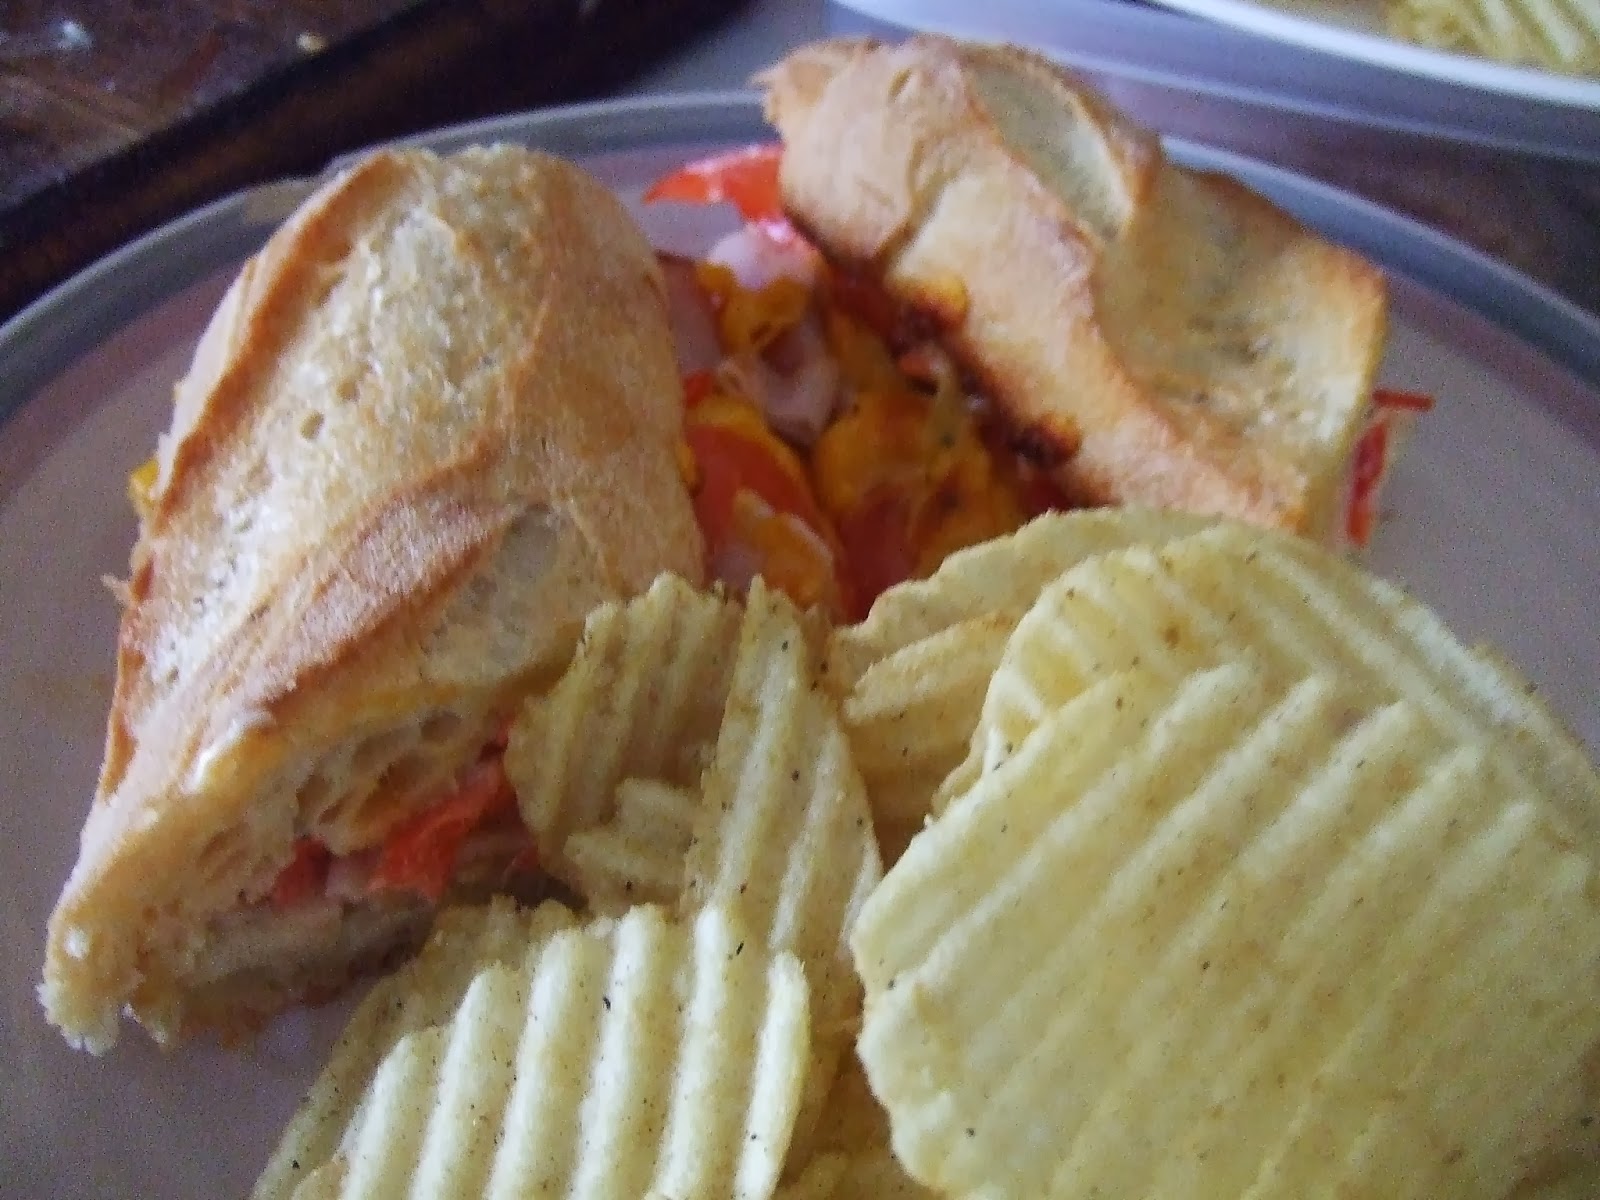
Both sandwiches were essentially made the same way, but the hot sandwich was placed in the oven on broil after sprinkling cheese on top. The cold sandwich has a fried cheese (I know it's not healthy, but it's so good).
 
Ingredients:
 
Get a nice French or Italian crusty bread (I bought mine on sale at Harris Teeters)
Thin sliced turkey meat (or whatever you like)
Tomatoes (thinly sliced)
Shredded Lettuce or mixed greens (optional...I didn't use any)
Red Bell Peppers (julienne- optional)
vinegar
olive oil
salt
pepper
oregano or Italian herbs (optional)
Mayonnaise
shredded cheddar cheese (I made fried cheese for the cold sandwich)
 
Chips on the side and pickle (you can make your own quick pickles with cucumber in vinegar and salt solution or you can get pickling lye ahead of time to do the usual water, sugar, salt, lye solution).
 
By the way, julienne is a term that refers to thinly slicing something the long way.


So, I believe that the key to making a sandwich is proper layering of the ingredients, and proper application of wet ingredients to prevent sogginess. This is why I no longer eat at Subway, which has too soft bread that gets soggy after they squirt a pint of vinegar and oil on it!
 
I cut the loaf of bread in half, and spread mayo evenly on either side of the bread. I layer the meat on the bread (I don't like too much meat, but my husband does, so that's up to the individual). Place the tomatoes, thinly sliced on top of the meat, the fried cheese goes on the other half of the bread.
After the tomatoes and other vegetables (if you choose to use them) are placed on the meat, sprinkle salt and pepper on the vegetables and then sprinkle a cap full of vinegar and a cap full of olive oil over the salted and peppered veggies.
 
For the fried cheese (it's an art, and you don't have to do this, if you don't feel like trying):
 
 
I prefer a cast iron pan for this
butter (just a pat)
cheddar cheese (shredded is what I always use)


I heat the pan to medium, and I put the pat of butter in the cast iron pan to melt (be careful not to burn it).

 
I spread it around in the pan.

 
Once it gets like this, I turn the heat to high for like 10 seconds, and then I turn the pan off completely. Then I start to scrape at the edges with a spoon.

 
I kind of peel it up at one edge with the spoon, and I keep a plate close by to transfer it quickly and to allow it to cool. Be careful not to scrunch it up while it's still too hot.


 You can see that this is greasy and probably not very healthy, but it's so delicious. So, I call anything that I put fried cheese on a "heart attack waiting to happen".
 
My Pickles:
I bought terrible pickles from the $1 store, and I emptied the liquid and replaced it with vinegar, salt, pepper and garlic.
 
Homemade chips:
Potato (sliced thin with a potato peeler)
Oil for frying
slice potatoes using a potato peeler to make chip slices
Allow oil to get hot (medium high)
flash fry the sliced potatoes in hot oil, by placing the slices carefully in the oil (try not to clump them on top of one another, and try to quickly drop a slice or two at a time, being careful not to burn the chips).


The cold sandwich is depicted above, and you can place the fried cheese on the half that is opposite the meat and veggies. Close your sandwich, cut it in half and place it on a plate with some chips or fries, and now you're ready to eat!


For the hot sandwich in the picture above, just sprinkle shredded cheese on top and place in the oven on broil only long enough to allow the cheese to melt (so watch it because depending on your broiler, this could happen in a minute).

Sunday, January 5, 2014

Fresh Falafel From Scratch!


Seth's Recipe                                                  

1 bag dried chick peas (garbanzo beans/chana, whatever you call them)
3-4 cloves of garlic diced
1 onion (medium sized) diced
1 cup chopped parsley
1 tbspn fresh mint chopped
1 tbspn fresh greek oregano chopped
2-3 tablespoons of flour (or cornstarch, but only 1 tablespoon)
1/4 tspn baking soda
1/4 tspn baking powder
1/2 tspn cumin
1/4 tspn turmeric
1 tspn paprika
1 tbspn olive oil


Soak chic peas overnight, and drain them. Use a blender to ground the chickpeas with the herbs, spices and the 3-4 cloves of garlic, 1 whole onion (medium sized). You can blend the onion and garlic down to a pulp prior to mixing it with the chic peas or you can blend all of the ingredients together, whatever works for the food processor or blender you have.

Some people even grind the peas to a flour and create falafel that way, but my husband does his this way.
Add the baking powder, baking soda, flour or cornstarch to the mix. You only want enough to make it bind/stick, but you don't want to get a mouth full of breading, so mind the amount of flour you use. It's best to ensure that you don't lose the chic pea taste. Drizzle the olive oil over the mixture, and stir the mixture well. Cover it and allow it to set in the fridge.


(allow the mixture to settle in the fridge for as long as you want, but at least 30 min to an hour for the flour and baking soda to properly absorb all the liquid in the mixture and come together as a homogenous mass).


Frying the falafel


Rub your hands with olive oil, or whatever oil you have so that you can shape the balls in perfect spheres. Some people use a special tool or a melon ball scoop or something. So, you can get creative. However, this is how  my husband does it.

Put them all on a plate like you see in the pictures below. The oil should be getting warm in the pan while you're doing this, but be careful not to burn it, and don't put too much oil because you don't want the oil to flow over the sides of the pan when you add the falafel to the oil. Or you can use a deep fryer...we even have one, but we never use it.

Fry the falafel until they are golden brown on the outside, and you don't want to put the oil on high heat, but you want to put it on medium, so the falafel doesn't cook too fast on the outside and not enough on the inside.


The fine recipe is in the picture above. However, I prefer the course recipe depicted in the picture below. Also, there is jajuk, which is a yogurt sauce/cold soup recipe that I like better than tzaziki.
 

Wednesday, January 1, 2014

Fresh Baked Bread for the New Year!

Seth's Fresh Baked Bread


1 C. water (for yeast blooming and dissolving sugar)
2-3 tablespoons of sugar
2 packets of rapid rise active dry yeast
4-6 C. Flour (all purpose flour)


Instructions

1 C warm water dissolve about 2-3 tablespoons of sugar (food for the yeast) in it and add 2 packets of rapid rise active dry yeast. Allow the yeast to bloom- the liquid gets a puffy top layer (you should be able to tell that your yeast is good and working by this feature).

Use 4-6 cups of flour (you can start with 4 and add as needed for the right consistency...this is my husband's recipe and he doesn't do a lot of measuring, it's like a memory that he has from his mother).


Add the flour to the mixing bowl and add the liquid to the flour and mix until the liquid is completely incorporated into the flour. Then obtain another cup of warm water and add a little at a time until the dough is a one homogenous mixture. You don't want the dough to stick to the pan, but you want it to stick to itself.


Flour your hands and take the dough out and knead it out on a floured workspace until it's not tacky anymore (your hand shouldn't stick to the dough anymore as much). Knead the dough to awake the gluten in the flour, the longer you knead it, the chewier your bread will be.

Lightly coat the pan or bowl that you're using and the dough with oil. Olive oil contributes better flavor, but vegetable and other oils work fine too. Put the oiled ball of dough in the oiled pan or bowl and allow it to rise until it has at least doubled in size. Take the ball of dough out and knead again on a floured surface.

Shape your bread by rolling it out on the floured surface and roll/fold the edges toward the middle. So, there is an edge that is closest to you and one opposite that (farther from you). Fold them in towards one another to meet in the middle of the dough. the two edges that have not been folded yet will be folded into the others. Here is a diagram to help visualize the process:


The pocket to get air bubbles in the bread is to prevent making a really dense bread. Now the dough can be rolled into a snake like shape (not too long), and then tuck the ends in. Let the dough rise again (at least doubling in size).

 Remember that the dough rise more as it bakes, so don't make it too big.

Place the dough on a flat baking pan or bread pan. Then cut slits in the top of the dough to allow steam to escape from the bread.

Bake the bread at 375 until golden brown. When you thump it with your finger, it should sound hollow and not dense.


Here's how it looks after you pull it out of the oven. I apologize for the lack of pictures for some of the key steps as I was not present for the entire process, but I'll do another bread blog post later with the corrections.